An inspection is set of images taken at a certain time. In this section, you will learn how to view images by inspection, find inspections in different ways, import inspections, export inspections, and delete inspections.
When you open the Images view of an experiment, Rock Maker displays images from the most recent inspection by default. To view images that were taken at a different time, you must select the appropriate inspection. Rock Maker provides two ways to do this.
Tip: To view all inspections that have occurred for a single drop, open the Navigator.
The Experiment Navigator is found at the top of main viewing area. To view an inspection from the Experiment Navigator, click the down arrow next to Imaging and select the time at which the inspection occurred. All plates on the Canvas will update to display images from the selected inspection.

Experiment Navigator
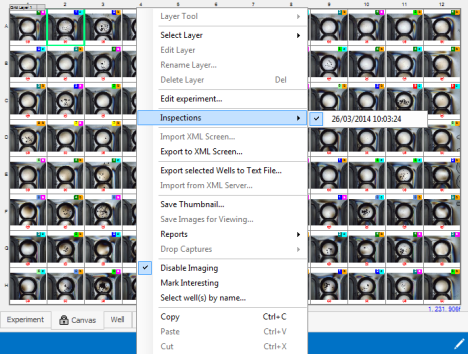
You can also select an inspection by right-clicking a plate on the Canvas and selecting the Inspections option. A submenu of all inspections will display, allowing you to select the appropriate one.

Right-click Menu
You can delete an inspection and all associated images and data.

Inspection Tab